How to inspect a bee colony

The most important element of a beekeeper’s work in an apiary is inspecting the hives; every beekeeper performs this work several times a season. The development of families and honey collection depend on how the beekeeper inspects the bees’ nest. However, inspections of bee colonies have many nuances that the beekeeper should take into account. Read to the end - it will be interesting and useful.
Content
- Type of bee nest inspection
- Thоrоugh inspection of the bee colony
- Partial inspection of a bee colony
- Preparing to inspect a bee nest
- Time to inspect the bees' nest
- How is a bee nest inspected?
Type of bee nest inspection
In beekeeping, inspections of bee colonies, depending on the degree of work performed by the beekeeper, are divided into
- thоrough inspection of bee colonies
- partial inspection of bee colonies
Thоrough inspection of the bee colony
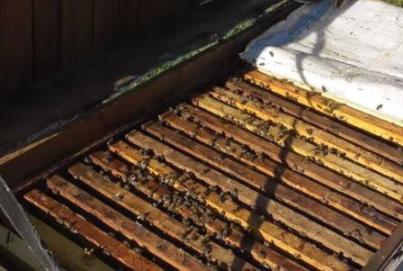
Thorough inspection of a bee colony requires inspection of all frames in the nest, which entails severe anxiety for the bee colony, which practically after such an inspection loses its working capacity for the whole day and stops collecting nectar and pollen, restoring the microclimate in the hive.
During the beekeeping season, only a few thоough inspections can be done, when carrying out such operations as:
- conducting spring beehive inspection,
- transplanting bees into a clean, disinfected hive,
- determining the amount of food in the hive in the fall
- final assembly of the bees' nest for the winter.
Partial inspection of a bee colony

During a partial inspection of the bees' nest, one or more frames are moved away (inspected). An example of such an inspection would be the expansion of bee nests, during which new frames are placed between the last brood frame and the honey frame.
Also, inspection of bees has its own characteristics depending on the time of year.
- Inspecting bees in winter
- Spring inspection of bees after the first flight
Preparing for bee inspection

Before starting hive inspection, the beekeeper must know what the purpose of this inspection of the bee colony is and what basic work needs to be done. It should be noted that the number of bee inspections associated with disassembling the nest, even partial, should be minimized. You should not inspect bee colonies without a predetermined goal, since the more and the more often the beekeeper disturbs bee colonies aimlessly, the less honey will be produced in the apiary.
Before hive inspection, the beekeeper prepares himself accordingly, all the necessary equipment to facilitate the performance of certain works, and most importantly, everything necessary (spare honeycombs with food or a container with syrup) so that hive inspection of bees takes the shortest possible time.
In order not to forget to prepare anything, it is better to make a complete list of necessary preparatory work the day before, as well as draw out the required number of tables for recording the condition of bee colonies.
Preparations for examining a bee colony include the beekeeper’s own personal hygiene. Bees are irritated by sweat, dirty clothes and hands. Taking a shower before visiting bees and after work should become a habit.
Bees are also irritated by strong odors.
The beekeeper's overalls - a white coat or overalls, as well as a face net - should always be clean and have good fasteners on the sleeves and neck. Do not wear fleecy clothes and shoes: this irritates the bees.
Hive inspection time
As a rule, a sunny, quiet, warm day is chosen for brood inspection. brood inspection is usually carried out at an air temperature of more than + 16 C. The time of brood inspection during the day is selected depending on the type of work performed. Some work is best done in the late afternoon, some work during the day.
Cold and wind contribute to the fact that the bees become more angry; at this time it is better not to inspect the bees, as well as during the period when there is no honey collection. However, situations often arise when it is necessary to inspect bees regardless of the weather. In this case, you can use a tent, which is installed above the hive and the bees are inspected.
How does hive inspection work?

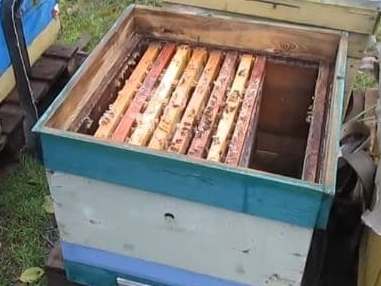
Before hive inspection, one or two streams of smoke are blown into the hive and after a while the lid is removed from the hive and placed in an inclined position with the roof against the hive.
Remove the insulation and, so that it does not get dirty on the ground, insert it into the tilted lid, carefully leaning it against the back wall of the case.
During hive inspection you cannot stand in front of the entrance. The beekeeper stands on the side of the hive, and his assistant with a smoker stands on the opposite side. Having removed the insulation from the hive, give 1-2 streams of smoke over the frames and begin to carry out the pre-planned work. The beekeeper should not abuse smoke: this bothers the bees.
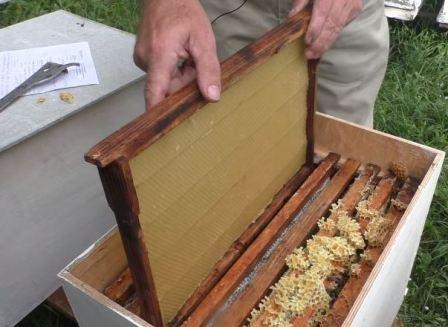
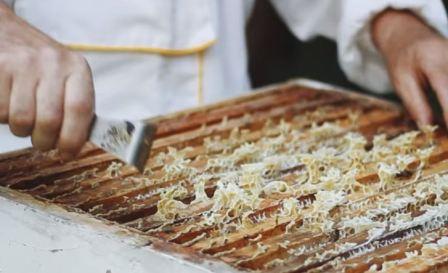
Before hive inspection, before removing the frame from the hive, it is carefully moved from its place with a chisel and lifted up by its shoulders. You should always remember that the slightest careless movement of the frame can crush the queen bee, so you should work very carefully. If it is necessary to inspect the honeycomb from the opposite side, turn the frame on its edge and, turning it around its axis, lower its upper shoulder down. You cannot hold the frame at an angle or turn it over, as freshly brought nectar will flow out of the cells, pollen that has not yet been compacted by the bees will spill out, and the honeycomb may break.
While inspecting the frames, they are held above the hive to prevent the queen from falling to the ground.
You cannot lean frames taken out of the hive against the hive: it can be stained with honey, and if there is no honey collection, this can cause bees to steal. The removed frame is placed in a portable box, closing it with a lid.
An important point is canvas. Only if it is warm and there is a good honey flow, you can simply remove the canvas and inspect the bees’ nest. In other cases, the canvas covers the frames in the nest; as the frames are inspected, the canvas is moved, and the second canvas covers the frames on the other side. This is especially true for novice beekeepers who cannot yet inspect a bee nest in a few minutes and need 20 - 30 minutes to thoroughly inspect all the frames with bees and draw the right conclusions. Canvases are needed not only to keep the nest warm, but also to prevent bee theft when there is no honey flow.
When working with bees, you are not allowed to make sudden movements or wave your arms: this irritates the bees. Having finished inspecting the nest, frames are placed in the hive in the same order. If necessary, place a follower board, side and top insulation into the hive and cover the hive with a lid. All work must be done quickly and carefully.
Remember, if you drop the hive lid or hit the hive hard, this will greatly anger the bees and make it difficult to inspect the hive.
